
Specifying Color Correction
You can specify the color correction method suited to the type of document to be printed.
Normally, the printer driver adjusts the colors by using Canon Digital Photo Color so that data is printed with color tints that most people prefer. This method is suitable for printing sRGB data.
When you want to print by using the color space of the image data effectively, select ICM. When you want to use an application software to specify a printing ICC profile, select None.
You can also set color correction on the Quick Setup tab by choosing Photo Printing under Commonly Used Settings, and then choosing Color/Intensity Manual Adjustment under Additional Features.
Open the printer driver setup window
Select the manual color adjustment
On the Main tab, select Manual for Color/Intensity, and click Set....
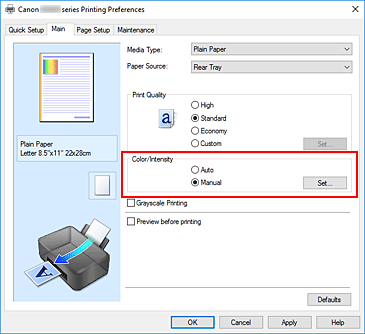
The Manual Color Adjustment dialog box opens.
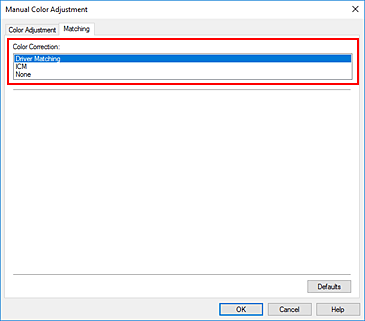
Select color correction
Click the Matching tab. Select the color correction method for the color that matches the document type that you are printing, and then click OK.
Complete the setup
Click OK on the Main tab.
When you perform print, the document data is printed with the specified color correction.
![]() Important
Important
- When ICM is disabled in the application software, ICM is unavailable for Color Correction and the printer may not be able to print the image data properly.
- When the Grayscale Printing check box on the Main tab is checked, Color Correction appears grayed out and is unavailable.

